
How to set up an Ubuntu Server on Amazon EC2
If you have ever dreamed of having your server, then I have good news. It has never been easier! In this tutorial, I will discuss why you want to have your server, how to set up your own Linux (Ubuntu) Server in less than 10 minutes and how to do this for free!
Why would you need your server?
A dedicated server with root access opens a whole new world of applications, even if you are just browsing the internet. Here are some use cases:
1. Webserver -if you are hosting a website, it might be a good idea to move it to your host, where you have full control.
2. Code/file repository - If you are going to collaborate with colleagues or friends on a project, it is crucial to have a common file repository. I’ve been using Subversion (SVN) for a long time, and it has proofed to be a viable partner.
3. Save Internet browsing - Is the local WiFi network at your favorite coffeehouse encrypted? If not, I recommend routing all your traffic through a Virtual Private Network (VPN). If you have your server, it’s quite easy to set up a VPN.
4. Streaming Netflix - Are you outside the United States? No problem, you can route the traffic from a US-based server through the VPN connection to your computer, TV, or iPhone, wherever you physically are.
5. Experimentation - instead of installing your stuff locally into Virtual Machines, try a server. With Amazon EC2 it’s faster and more convenient.
These are just a few examples, to give you an idea about what you can do with your server. Of course, the application of it is just limited to your imagination!
Why Amazon EC2?
Amazon has not only emerged from a bookseller to a wholesaler, but it has also created one of the world’s most powerful IT infrastructures to deliver its content in a fast & responsive way. Fortunately, Amazon has decided to sell these IT services to the public, as well. They are called Amazon Web Services (AWS) and consist by today of a wide variety of different services. For example, all the mp3 files of my podcast are stored and delivered through Amazon Simple Storage Service (S3). Another service is Amazon’s Elastic Cloud Compute (EC2), which makes it easy to create a virtual Server. Within a few mouse-clicks you can add almost infinite hard disk space or multiply the amount of CPUs, as you like (and as you can pay) 😉
Best: During the first year, a micro instance is with 10Gbyte of Harddisk is completely free!
All you have to do is to register your own Amazon AWS account.
Let’s get started
After creating your Amazon AWS account, you need to register for EC2. The management console allows you to select predefined images (AMIs). There exists a wide range of predefined images. Feel free to select your favorite Linux distribution and follow the installation instructions. After less than 5 minutes, your Server instance is configured and ready to launch:
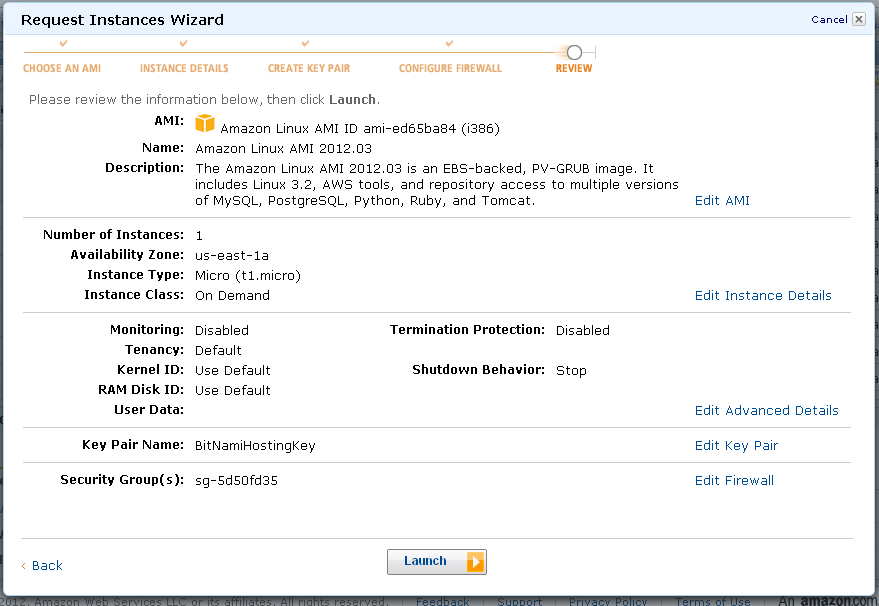
A minute later, your Server is up & running. Now you can connect yourself to the server and start configuring it.
Make it even more convenient
A more convenient way however is to use an additional service called Bitnami. Bitnami allows you to preconfigure your server individually through a polished web interface. Instead of installing the LAMP Stack (Linux, Apache, MySQL, PHP) by hand, Bitnami will do this for you. You just need to decide which kind of Linux Distribution you prefer and what you need on top (e.g. WordPress, Drupal, Joomla, etc). You just configure the server through Bitnami - it will be hosted directly on the AWS infrastructure, within your AWS Account. Here is a look the configuration looks like:
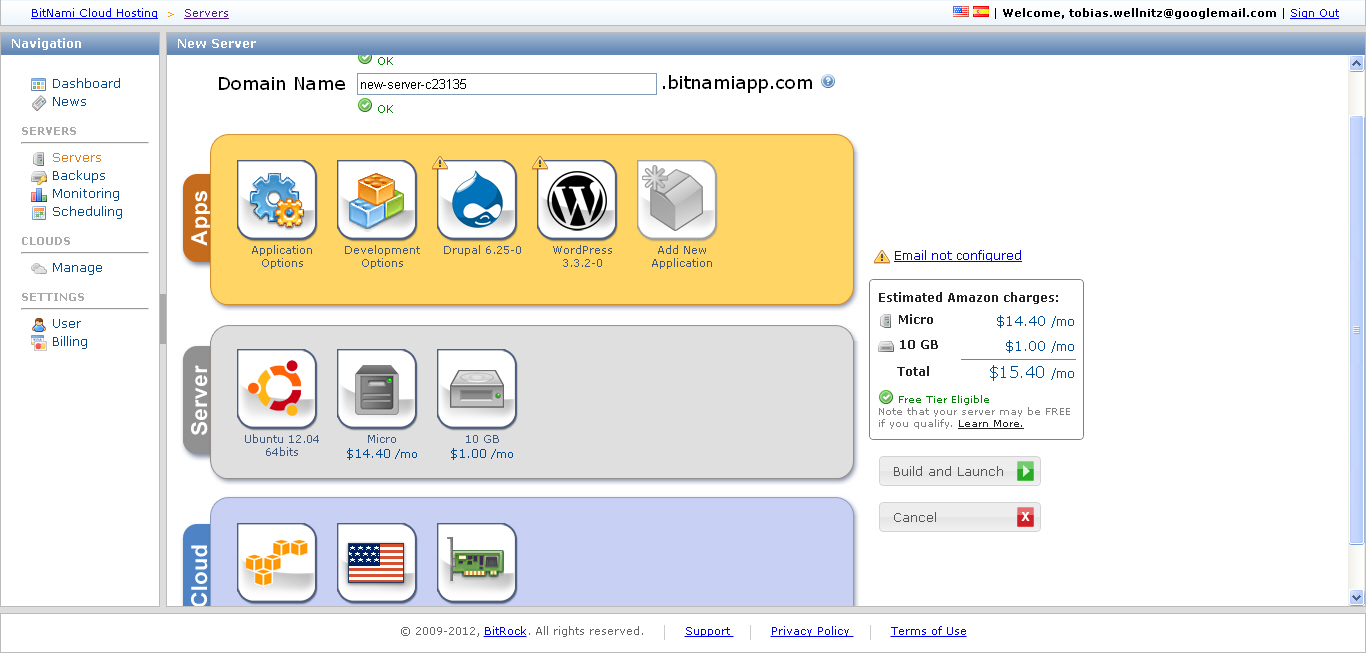
Depending on the size of the instance and hard disk, bitnami will show you automatically the estimated monthly cost. But again, if you are a new AWS client, a micro instance will be free for one year!
If you are setting up a remote server on Amazon AWS I suggest using bitnami. The preconfigured images are very good and they provide a useful Wiki which guides you through the first steps. Bitnami will for example register a DNS record for you automatically so that you can access your server directly by SSH or through your web browser.
Costs
Again, Amazon will give you a Micro Instance (2 cores & 613 MB Ram) for one year for free. The uptime of your server is billed hourly. By today, an online hour for the instance costs 0,02 USD (free for the first year). Incoming traffic is free, outgoing traffic costs a little bit (0,1USD / GByte).
I’m using the iPhone App called Cloud Service Manager to conveniently startup, shutdown, or monitor my AWS instances.
Final words
It has never been easier to set up your server. All you need is an Amazon AWS account and your server will be up and running within a few minutes. There is plenty of good wikis and help available, however, some basic Linux administration skills won’t harm you!
